The View.setTag(Object) is a nice API that allows you to attach an arbitrary piece of information to the specific view. For example, you can “point” tweet row view to the data object that has the metadata used to create the view, or “point” the contact row view to the data object that has the metadata about the contact itself (as shown in the QuickContactsDemo). View holders are particularly popular examples of using view tags – if you have homogeneous rows and need to access child views for the specific list row, you create a view holder object that holds references to those child views and access them directly instead of using the View.findViewById() API. See the List14 demo for the full example.
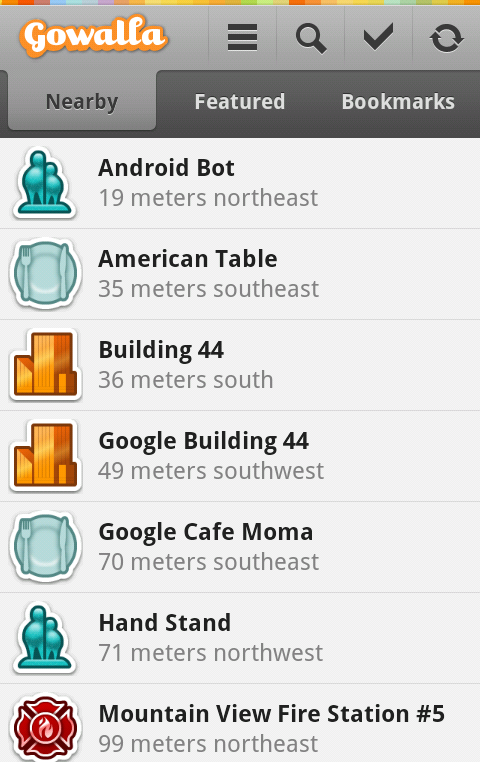
Today i want to talk about how we used the view tags in the following landscape screen that shows the details of the specific Market application:

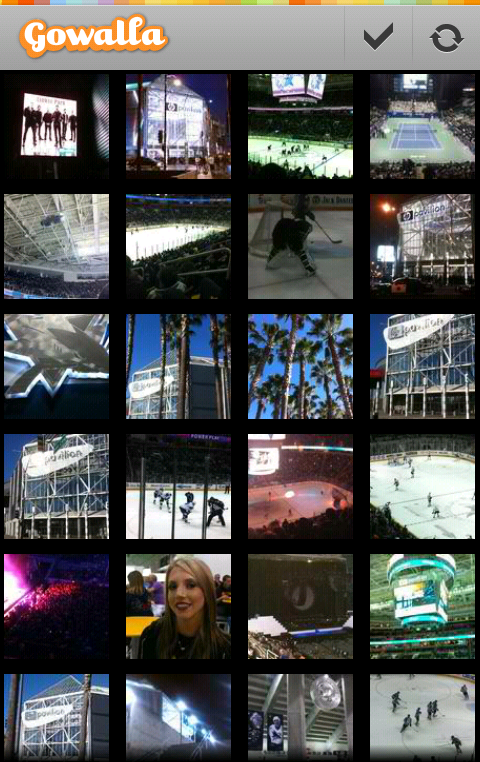
This screen has two major parts – the left half is static, showing the overview of the application itself and a button to accept the permissions and install the app. The right part is a vertically scrollable information on the app, including the description, screenshots, comments, related apps and more. As with portrait layout of some of the screens, these two views overlap. The thin vertical area that “hosts” the curved right arc of the green section is the intersection area of the two components. The reason for this is purely aesthetic – note how the fading gray background of the section headers extends and disappears behind the curved arc. This creates a nice visual continuity and connection between the two sections, especially during vertical scrolling. Here is another screenshot of the same screen, this time with one of the comments highlighted (note that the comment highlighting will be available in the next Market client release):

There is a lot of information in the right half of the screen, with each section and row implemented with its own layout (where some layouts are reused in other Market client screens, and all layouts are used in the portrait mode). Given that the parent panel intersects with the left half of the screen, we need to have a consistent way of “pushing” the content of each row to the right when it’s displayed in the landscape mode. If we don’t do this, the content will be partially hidden behind the curving arc, resulting in poor user experience.
As mentioned above, some of the child layouts used in this screen are used elsewhere in the application. In addition, the horizontal pixel extent of the arc itself is not known at compile time – it depends on the physical height of the screen and is computed to maintain a consistent perceived curvature across different hardware configurations. Given these two limitations, it was rather impractical – if not impossible – to define the left padding for each one of the child views in the layout definitions themselves. Instead, here is what we do (at least right now):
- Each child layout is defined separately based on the target design. Some views do not have explicit left padding, while some views do.
- At runtime, we use View.getPaddingLeft() to get the original left padding, add the horizontal pixel extent of the arc and drop shadow size scaled to the device density and call View.setPadding() – passing the original top, right and bottom paddings.
- However, you cannot rely on how many layout passes the system will make on each specific row. If you start adding that extra padding on every layout pass in your custom layout, you may end up with double, triple of even more application of the computation above. The solution here is to store the original padding as an Integer tag on the child view. Then, when you need to apply extra padding, you check to see if the tag is already set. If it’s not set, get the current left padding and store it as a tag. If the tag is not null, convert it to Integer and apply extra padding
While the flow above is a nice solution for a custom layout, you can do even better:
- Call View.getViewTreeObserver() and then ViewTreeObserver.addOnPreDrawListener().
- This listener will be notified on every draw operation. In the callback itself you can apply that custom left padding on all the child views. However, you don’t want to do this on every single draw operation.
- To detect the first “real” draw we check to see whether the height of the relevant container is not 0. As long as it is 0, it means that the container has not been laid out within the bounds of its parent.
- The first time the container height is more than 0, we apply the custom left padding and set a boolean flag to return immediately on the next callback invocation.
- In addition, we apply the custom padding whenever a new child is added to the container – to handle cases where a child is added dynamically after the parent has been laid out.
Why go to all this trouble and not set the left padding on the entire right-half container? The answer is simple – that left padding will push all the child views to the right, and while the content will be properly displayed to the right of the curved arc, the section header backgrounds and individual row highlights will not extend behind the arc. They will kind of “hang” next to the carousel creating:

See how the background highlights of the rating widget and the description section header do not extend behind the arc – and compare to the screenshots above.
Finally, getting back to the view tags, don’t forget the View.setTag(int, Object) API that allows setting multiple tags on the same view. Note that you should not define your own integer constants and pass them to this API. Instead, add an ID resource file in your res/ folder and use the generated constant that will be both unique and readable.
It’s easy to dismiss animations as an unnecessary and, at times, superfluous layer that takes valuable development time and puts unwarranted strain on the device processing units. However, moderate amount of animations applied at the correct places can greatly enhance usability and improve the overall user experience of your application. Today i want to focus on a few techniques relevant to displaying images in your Android applications.
There are quite a few applications that display images or icons – user avatars in twitter / facebook clients, app icons in the market listings, preview thumbnails in restaurant listings – just to name a few. Since this information is dynamic, the images are loaded from the net on the first use. And even if the app caches the images for subsequent display, the cache entries may get evicted if the cache grows too large. There are a few patterns that can be seen while the image is loading – some apps display an empty (transparent) placeholder, some apps show an infinite circular progress indicator, and some apps show a default placeholder. Once the actual image is loaded from the network and transcoded into a BitmapDrawable, the vast majority of applications will “snap” to displaying that image.
While this is perfectly functionable, we can do better. The human eye has certain hereditary traits that automatically detect and react to sudden changes. This means that sudden snaps from a transparent placeholder to a full-opacity full-color image is an unnecessary distraction. This can be easily addressed by fading in the newly loaded image over a brief period of time. The new animation layer added by Chet Haase in Honeycomb makes it ridiculously easy. All you need to do is add one (!) line of code:
ObjectAnimator.ofFloat(bitmapDrawableView, "alpha", 0.0f, 1.0f).setDuration(100).start();
The first parameter of the ObjectAnimator.ofFloat() specifies the main object whose property is to be animated. The second parameter specified the property to be animated – alpha. Internally, the animation layer will use reflection to access the newly added View.setAlpha() API to interpolate the alpha value from 0.0f to 1.0f over an interval of 100ms. The call to setDuration() is optional and can be omitted if you’re OK with the default duration value. Note how the fluent API allows chaining the API calls and defining a fade-in animation is one short and quite readable call. Now all you need to do is define your ImageView with initial alpha of 0, set the bitmap or drawable once it’s loaded from the network and run the code above.
But wait, you say. These are new APIs in Android 3.0. What can i do if i’m targeting the older platform versions? Don’t despair. There are two handy ways to achieve the same functionality. The first is rather generic and can be applied to any scenario that requires running an animation. In fact, it’s pretty much the same approach as described in my older entry on writing Android live wallpapers:
- Create a Handler object and a Runnable object.
- Register your Runnable by calling Handler.postDelayed() API.
- When your Runnable.run() is called, check to see how much time has passed since the “beginning” of your animation.
- If the animation is still in progress, update the relevant views based on the current animation position.
- In addition, schedule “yourself” (the same Runnable) by calling Handler.postDelayed().
The ImageView.setAlpha() API is available on the older framework versions and can be called on every animation frame. As a sidenote, it’s important to remember that even though the Handler.postDelayed() gets a millisecond-level delay, you should not make any assumptions on how much time has actually passed. The system may be busy, or there have been higher priority events scheduled in the mean time. You should store the timestamp at the “beginning” of your animation and update the views based on how much actual time has passed since the beginning. In the same vein, the animation is done (no more scheduling the runnable) based on the system clock and not on the total delays passed to the Handler.postDelayed().
This approach is rather generic and can be used to update multiple views that participate in the same animation scenario. If all you need to do is fade in an image, there’s a simple solution – the TransitionDrawable class. It’s a rather handy, albeit slightly awkward, way to cross-fade between two images – and if you need to just fade in a newly loaded image, you can can pass a completely transparent drawable as the initial value. Here, instead of setting the initial alpha value of your ImageView to 0, you set it to display a transparent drawable. Then, once the final image is loaded:
- Create a new instance of TransitionDrawable passing an array of two drawables – the transparent once, and the newly loaded one.
- Optionally, call TransitionDrawable.setCrossFadeEnabled(true) – this is relevant when the first image is not fully transparent. If the second image has some transparent or translucent pixels, you don’t want the first image to stay opaque throughout the cross-fade sequence – otherwise you’ll end up with too much visual noise.
- Finally, call TransitionDrawable.startTransition(duration) to start the cross-fade sequence.
As mentioned above, the API of the TransitionDrawable class is rather awkward. The constructor gets an array of Drawables, and the Javadocs specify that you need to pass at least two layers. However, there is no explicit documentation on what happens when you pass more than two. The class-level Javadocs say that the class is “intended” to cross-fade between the first two layers, but makes no explicit statement what happens when you pass more than two layers. A glance at the code reveals that only the first two layers “participate” in the drawing sequence.
So, here you go. Now would be as good time as any to add fade-ins and cross-fades to your images and make your image loading transitions a little bit less distracting.